Here are some fun activities that your child might also enjoy!
http://www.dltk-holidays.com/thanksgiving/games.htm
http://www.blackdog.net/holiday/thanks/
http://www.edhelper.com/Thanksgiving.htm
http://www.amazingmoms.com/htm/thanksgiving_games.htm
Thursday, October 26, 2006
November Toddler Kits
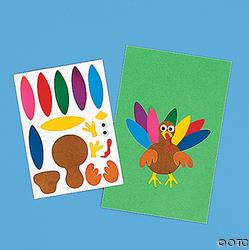
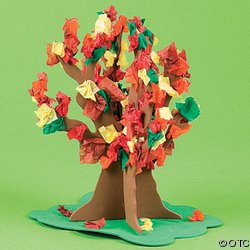
Project #1 -- Create a Turkey Stickers -- Your little one will have lots of fun with this adorable set of Turkey Stickers Project #2 Fall Leaves Tree -- The tissue paper leaves will be fun for your child to crinkle and attach to the foam tree. What a fun centerpiece for Thanksgiving dinner!
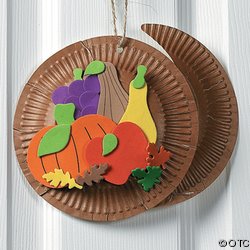
 Project #3 -- Cornucopia Paper Plate -- This colorful decoration will be a lot of fun for your child, they will enjoy naming the colors, and the different fruits and vegetables while attaching them to the plates. The foam pieces do take some time for the glue to dry, so your child will need to be patient while waiting to hang this up.
 Project #4 -- Color a Thanksgiving Placemat

 Project #2 Fall Leaves Tree -- The tissue paper leaves will be fun for your child to crinkle and attach to the foam tree. What a fun centerpiece for Thanksgiving dinner!
 Project #3 -- Cornucopia Paper Plate -- This colorful decoration will be a lot of fun for your child, they will enjoy naming the colors, and the different fruits and vegetables while attaching them to the plates. The foam pieces do take some time for the glue to dry, so your child will need to be patient while waiting to hang this up.
 Project #4 -- Color a Thanksgiving Placemat


November Kids Kits
The November Kids Kits are here! They should be going out in Monday's Mail, and you can expect to receive them shortly thereafter.
Project #1 -- 3D pumpkin Wreath. I don't have a photo of this one, but it is a great project, and I'm sure that your child is going to enjoy it.
Project #2 -- Felt Fall Coasters
I thought this project was a really unique one, and I think your child will think it is really fun.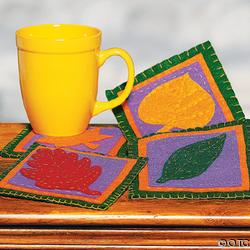
Project #3 -- Color a Fall Puzzle
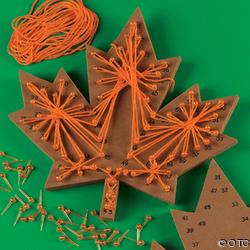
We don't usually do a lot of coloring projects in the Kids Club, but I thought these were adorable.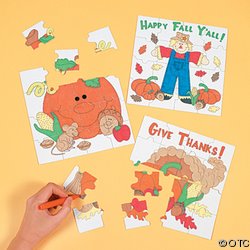 Project #4 -- Fall Leaf String Art
I think these string art projects are always a lot of fun for everyone, and I thought this one was really unique.
Project #5 -- Pilgrim Paper Plates
I think these are a really cute holiday decoration. A couple of notes on working with foam pieces. Glue dots (available at any craft store, or Wal-Mart) will help to secure the pieces while you wait for the glue to dry. If you are using Elmer's glue, your child will need to be patient, because it does take a while for these to dry. 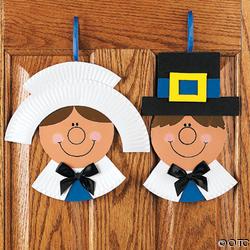
Have a Happy Thanksgiving!
Sunday, September 24, 2006
Fun Halloween Links
Here are some great links to fun Halloween activities you can try at home!
http://abcteach.com/directory/theme_units/month_to_month/j_october/halloween/#13085
http://123child.com/UBB/showthread.php?t=3085
http://www.benjerry.com/fun_stuff/holidays/halloween/history/index.cfm
http://resources.kaboose.com/games/hall.html
http://abcteach.com/directory/theme_units/month_to_month/j_october/halloween/#13085
http://123child.com/UBB/showthread.php?t=3085
http://www.benjerry.com/fun_stuff/holidays/halloween/history/index.cfm
http://resources.kaboose.com/games/hall.html
Saturday, September 23, 2006
The October Projects are here!
Here are the Kids Projects
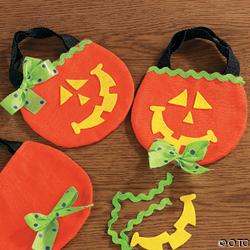
Kids project #1 -- Halloween Tote Bag. All this project takes is a little glue for the felt pieces. One thing I liked a lot was the option on the instructions to make a "girl" tote bag by putting the bow on the top, and a "boy" by placing it like a bow tie. This little bag is perfect for Halloween events where your trick or treater might get small amounts of candy (we do a great event every year at our local library). No reason to lug around a big bucket!
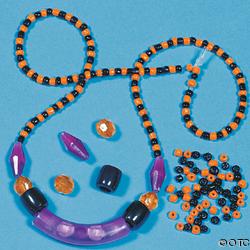
Kids Project #2 -- Light up necklace
I love this project because kids can wear this necklace along with their costume without it looking too out of place. It's easy to turn the light up components on and off very easily. One note on the instructions... it says to thread the cord through the light up piece, which is VERY difficult to do. This piece actually snaps apart and then back together, which will let you place the cord inside really easily.
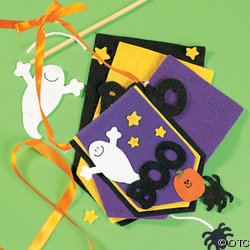
Kids Project #3 -- "Boo" Banner
A great decoration for Halloween time!
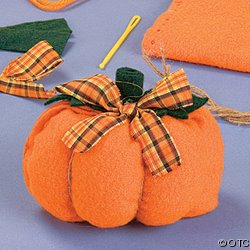
 Kids Project # 4 -- Felt Pumpkin
I really love projects like this that give kids a chance to try their hand at something new, like sewing. This simple project has pre-punched holes in the felt, that your child can easily lace up using the enclosed plastic needle. One fun thing I liked a lot was that although you start out with what looks like just an orange square pillow, the Pumpkin takes shape very easily, and is a lot of fun to make.
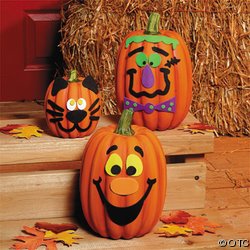
 Kids Project #5 -- Pumpkin Decorating Kit
I love this project! These great adhesive foam pieces adhere right to your pumpkin, which means you can decorate your pumpkin and leave it on display for ages! We have several of the kits you can use to print and create really amazing designs on a Jack O'Latern, but it is always disappointing to see how quickly the pumpkin disintegrates after it has been carved. Not doing pumpkins this year? These would also be fun on construction paper, or have your child paint a paper plate orange and decorate it with these instead!
Here are this month's Toddler Kits
Toddler Kit #1 -- Paper Plate Spider or Ghost
These projects are very simple and fun, and will make a great Halloween decoration! Please note, each child will get either the spider or the ghost, not both.
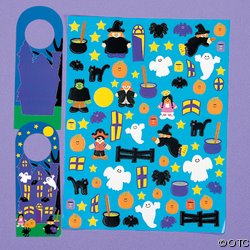
Toddler Project # 2 -- Halloween Door Hanger
Stickers are always popular with our youngest members, so this month they are getting several sticker projects. I liked this one a lot, and your child will enjoy hanging it on their door.
Toddler Project #3 -- 3D Haunted House
I love this project because then end result is pretty elaborate, but its really very simple for your child to do. They will probaby need help locking the two pieces of cardboard together, but then they can have lots of fun decorating this spooky haunted house with all the stickers included.
Your child will also be getting a set of Halloween themed Cardstock stickers this month. They are very cute! Enjoy!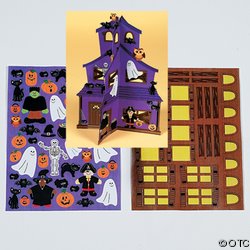
Monday, August 28, 2006
Fun Links to Go with our Space Theme
Here are some fun links that go with our Toddler Club's Space theme this month we think you might enjoy them
NASA Kids Club and other fun NASA Links
http://www.nasa.gov/audience/forkids/kidsclub/flash/index.html
http://spacekids.hq.nasa.gov/osskids/
http://saturn.jpl.nasa.gov/kids/index.cfm
http://www.esa.int/esaKIDSen/Astronauts.html
NASA Kids Club and other fun NASA Links
http://www.nasa.gov/audience/forkids/kidsclub/flash/index.html
http://spacekids.hq.nasa.gov/osskids/
http://saturn.jpl.nasa.gov/kids/index.cfm
http://www.esa.int/esaKIDSen/Astronauts.html
A Fun Project to try at home -- Marbled Paper
Here is a great at home project for you to try. We just made cards out of this homemade marbled paper, and it was a lot of fun.
You will need:
Shaving Cream (buy the cheapest you can find, we used plain old Barbasol)
A Baking Dish
Spatula
Construction Paper or Card Stock
Tempera Paint (Washable is best!) in 2 or 3 complementary colors.
Small Paintbrush
To start, fill a baking dish with shaving cream, 1-2 inches thick.
Smooth surface with a spatula.
Drizzle paint over the shaving cream.
Using the handle of your paint brush, swirl the paint to make interesting patterns.
Press a sheet of paper into the pan.
Make sure to get the whole sheet of paper covered with shaving cream.
You can either wipe the paper with a paper towel at this point in the process, to speed the drying process, or let it dry overnight to let the shaving cream evaporate.
We used these for party invitations, and they turned out really great!
You will need:
Shaving Cream (buy the cheapest you can find, we used plain old Barbasol)
A Baking Dish
Spatula
Construction Paper or Card Stock
Tempera Paint (Washable is best!) in 2 or 3 complementary colors.
Small Paintbrush
To start, fill a baking dish with shaving cream, 1-2 inches thick.
Smooth surface with a spatula.
Drizzle paint over the shaving cream.
Using the handle of your paint brush, swirl the paint to make interesting patterns.
Press a sheet of paper into the pan.
Make sure to get the whole sheet of paper covered with shaving cream.
You can either wipe the paper with a paper towel at this point in the process, to speed the drying process, or let it dry overnight to let the shaving cream evaporate.
We used these for party invitations, and they turned out really great!
Subscribe to:
Posts (Atom)


